Mounts & Security · Guide
DIY trail camera mounts and lock boxes: what is worth building and what is not
A post mount costs an afternoon and some scrap. A lock box that actually resists a pry bar costs more in steel and welding than the box you can buy. Here is where the line sits, and the three parts no homemade version replaces.
By Mike M.Updated Spec-checked · every figure sourced
#adReader-supported: we may earn a commission if you buy through our links, at no extra cost to you. It never decides a ranking. How we rank · Disclosure
Where the build-or-buy line actually sits
Nearly every trail camera accessory does one of three jobs: it holds the camera somewhere, it stops the camera being taken, or it makes the camera point where you want. Those three jobs have very different build-or-buy answers, and most DIY advice online muddles them together.
Holding the camera is mechanically trivial. A trail camera weighs about as much as a paperback and attaches with a 1/4-20 bolt — the same thread as a camera tripod. Anything rigid with a hole in it will do the job: a fence post, a length of 2x4, a T-post clamp, a steel angle bracket. This is where DIY genuinely wins, because the commercial versions are solving a problem that scrap lumber also solves.
Stopping theft is not trivial, and this is where homemade solutions quietly fail. A lock box works by being inconvenient enough that someone walking past with a screwdriver gives up. That requires steel of a real gauge, a cut that matches the camera's lens, flash and sensor windows exactly, and a lock point that cannot simply be levered. Every one of those is harder and more expensive to produce once than to buy.
Aiming sits in between. A fixed mount on a leaning tree points your camera at the sky or the dirt, and a homemade mount almost never has the adjustment a purpose-built head has. You can shim it with a wedge of wood and most people do. You will adjust it more often than you expect.
So the honest summary is: build the mount, shim the aim if you have to, and buy the box and the cable. The rest of this page works through each of those, with what each actually costs rather than what it looks like it costs.
The T-post and fence-post mount
If you have fence line on the property, you already have mounting points, and this is the single best DIY trail camera mount there is. A steel T-post is rigid, already in the ground, and sits at a height that needs no ladder.
The simplest version is two hose clamps and a scrap of flat steel or hardwood: clamp the flat stock to the post, drill a 1/4-inch hole, bolt the camera through it with a 1/4-20 bolt and a washer. Total cost is a few dollars if you buy the clamps and nothing if the scrap is already in the shed. It is rigid, it does not move in wind, and it survives being hit by a mower deck better than most commercial mounts do.
Two details decide whether it works. First, the camera must sit proud of the post rather than hard against it, or the post itself blocks part of the detection cone on one side. An inch of standoff is plenty. Second, a T-post has a studded face and three flat faces; mount to a flat face, because the studs stop the bracket sitting square and the camera ends up canted.
The thing a homemade version does not give you is adjustment. A commercial T-post clamp slides up and down the post and tightens with a knob, which means you can re-aim in ten seconds without tools. If you expect to move the camera around a lot, that convenience is most of what you are buying. If the camera is going on one post and staying there, the hose-clamp version is honestly fine.
Wooden fence posts are even simpler: a lag screw with a 1/4-20 adapter, or a short length of 2x4 lag-screwed to the post as a mounting plate. The same rules apply about standoff and about checking the post is not the thing that moves.
The scrap-lumber board mount
The board mount solves the problem no tree solves: a tree that leans, or a spot with no tree at all. Take a length of 1x6 or 2x4 about two feet long, bolt the camera to one end, and strap or screw the other end to whatever vertical surface you have. On a leaning trunk, a wedge of scrap behind the top or bottom of the board brings the camera back to level.
It is crude and it works, and it has one advantage over every commercial mount: the board gives you a surface to shim against, which is the actual mechanism by which you fix a bad angle. A ball head on a commercial mount does this more elegantly; a cedar shingle and two screws does it for nothing.
Use a strap rather than screws where you can — screws into a live tree are a wound and a liability on land you do not own, and a strap moves. The webbing and the buckle are the two parts worth not improvising, for reasons covered in best trail camera straps: a plastic buckle under UV is the part that fails first, and a camera on the ground is a camera that has photographed the forest floor for three weeks.
One honest limitation. A board mount is visible. It reads as human from a long way off, and on public ground it draws exactly the attention you are trying to avoid. For anything where concealment matters, read how to hide a trail camera first and reconsider.
The ground stake and tripod route
Two more build options worth knowing, both for places with nothing vertical to work with: a food plot, a sand bar, a fence corner with the post gone.
The ground stake is a length of rebar or a steel garden stake driven into the ground, with a bracket on top. It is cheap, it is inconspicuous once vegetation grows, and it puts the camera at knee height, which is a genuinely good height for some sets and wrong for others — the argument is in trail camera height. The failure mode is frost heave: a stake set in soft ground in autumn can be noticeably off-level by January.
The camera tripod is the one almost nobody mentions. A trail camera uses the same 1/4-20 thread as a photographic tripod, so any old tripod in the loft becomes a mount. It is unstable in wind, it is obvious, and it walks off if anyone finds it — but for a temporary set over a few nights to answer one question, it costs nothing and takes a minute.
The homemade lock box, costed honestly
This is the part of DIY trail camera advice that needs the most honesty, because the arithmetic almost never works and almost nobody does it before starting.
A security box has to do four things at once: be made of steel thick enough that it cannot be folded open, have openings cut to the millimeter so the lens, the flash array and the PIR sensor are all unobstructed, close on a hinge or lip that cannot be levered, and anchor to the tree through the box rather than around it. Miss any one and you have built a steel case that makes your camera take worse photographs while remaining stealable.
There is one case where building is the right answer: a camera model nobody makes a box for. Box makers cut for the popular bodies and nothing else, so if you are running something unusual, a fabricated box or a universal box with the apertures opened up may be the only option. Go in knowing it is a fabrication job rather than a weekend project, and cut the apertures generously — a box that vignettes the flash is worse than no box.
The cheaper middle path that most people miss: a universal box plus a mount, rather than a model-specific box. It fits worse, it costs less, and it moves to your next camera. For why the box matters at all, and what it does and does not prevent, see how to keep your trail camera from being stolen.
The cable is the part you should not improvise
Of everything on this page, the locking cable is the component where homemade substitutes fail most predictably, and it is also the cheapest to buy properly.
The job is specific: a cable that resists bolt cutters long enough to be not worth the trouble, in a diameter that fits through the cable slots every security box maker cuts. Braided steel at around 5/16 of an inch is what the boxes are designed around. Substitute a bicycle cable and it cuts in a second. Substitute chain and it will not pass through the slot. Substitute wire rope with cable clamps and the clamps are the weak point.
It is worth being clear about what a cable does and does not do. It does not make a camera un-stealable — nothing does. It converts a ten-second opportunistic grab into a job that requires tools, noise and time, which is enough to deter the overwhelming majority of camera theft. That is the whole mechanism, and a cable that fails the bolt-cutter test does not deliver it. The options are compared in best trail camera locks and cables.
Four DIY ideas that cost people cameras
- Cutting your own lens aperture with a hole saw. The hole is never quite where you measured, and a few millimeters of steel across the edge of the flash array puts a dark band down one side of every night photograph. Measure from the camera, not from the box.
- Painting or taping over the IR array to hide the glow. It does hide the glow. It also absorbs the infrared you need for the picture, and the result is black night photographs that look like a camera fault. If the glow is the problem, the fix is a 940nm no-glow body: no-glow vs low-glow.
- Mounting to a sapling. A trunk under about six inches moves in wind, and a camera that moves triggers on its own field of view. Those are the empty photographs people blame on the camera: trail camera false triggers.
- Sealing the box with silicone to keep water out. The camera is already weather-sealed; the box is not supposed to be. Sealing it traps condensation against the lens and you get a season of fogged images, with no way to vent it.
None of those are hypothetical — they are the recurring reasons a camera that was working stops producing usable images after someone improves it.
The parts worth buying
Four components where the commercial version is cheap enough and specific enough that building your own is a false economy. Each one is the piece a homemade mount cannot replicate: a real adjustment head, a clamp that moves without tools, a cable cut to fit the boxes, and webbing with a metal buckle.
Our picks for this
Buy these four, build the rest
A tree mount with real adjustment, a T-post clamp that moves without tools, the braided-steel cable every box maker designs around, and a strap whose buckle is metal rather than plastic.
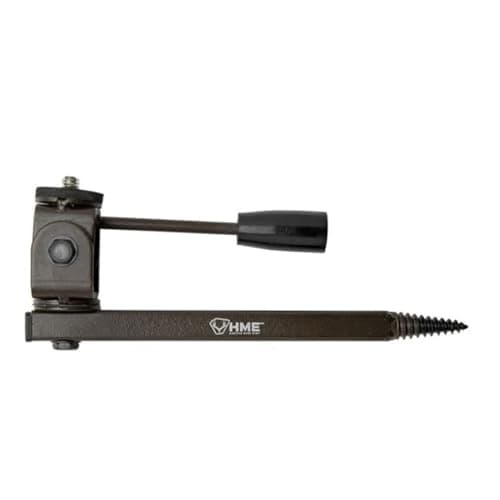
Best trail camera tree mount
HME Trail Camera Holder Tree Mount
Tree mount9.8/10The adjustment is the point. 360 degrees of rotation and 120 degrees of tilt on a standard 1/4-20 stud, which is exactly what a shimmed board mount cannot give you.
$11.05Amazon#ad · Price as of November 6, 2026 · Disclosure for the link to HME Trail Camera Holder Tree Mount
Best T-post trail camera mount
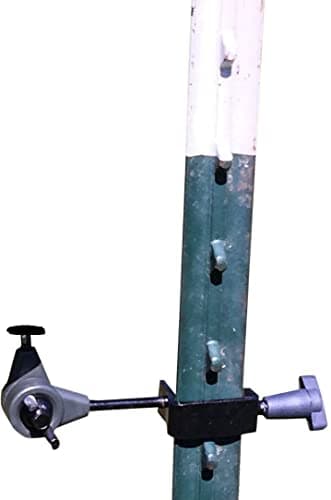
HME T-Post Trail Camera Holder
Post / stake9.3/10Slides over any flat face of a standard T-post and tightens with a knob. The hose-clamp version works; this one re-aims in ten seconds without tools.
$11.99Amazon#ad · Price as of November 6, 2026 · Disclosure for the link to HME T-Post Trail Camera Holder
Best trail camera locking cable
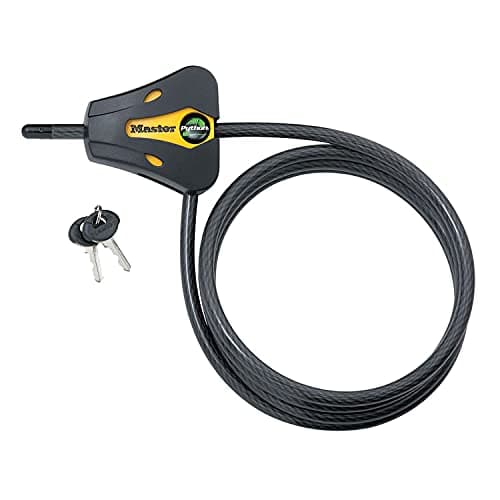
Master Lock Python 8419DPF Adjustable Cable Lock (6 ft)
Lock / cable9.4/10The 5/16-inch braided-steel cable that security box makers cut their slots for. This is the component on this page with no sensible homemade substitute.
$21.77Amazon#ad · Price as of November 6, 2026 · Disclosure for the link to Master Lock Python 8419DPF Adjustable Cable Lock (6 ft)
Best heavy-duty trail camera strap
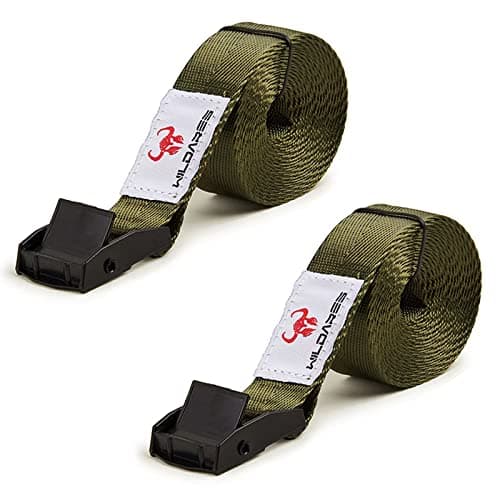
WILDARES Trail Camera Strap, 1 in x 6.6 ft (2-Pack)
Tree mount9.4/101-inch webbing on an alloy cam buckle. The buckle is the part that actually fails on a cheap strap, and a plastic one under two summers of UV is a camera on the ground.
$8.99Amazon#ad · Price as of November 6, 2026 · Disclosure for the link to WILDARES Trail Camera Strap, 1 in x 6.6 ft (2-Pack)
If you want a box rather than building one, the model-specific options and the universal fallback are ranked in best trail camera security boxes — including the CAMLOCKbox boxes cut for named camera bodies, which is the fit a homemade box cannot match.
How we scored this
The research behind these picks
Every pick here is built from documented evidence: the maker's published trigger speed, flash type, battery configuration and detection range; each brand's plan tiers verified on its own plan page and turned into the real monthly cost at one and four cameras; the independent shootouts (Trailcampro, Outdoor Life, Field & Stream, TechGearLab) cited by name for the measurements they published; and a public rubric applied the same way to every model. Every figure links to where it came from, so you can check our work in one click.
Scores are editorial judgments from that documented research. Commissions never set a score or decide a pick. The rubric and its weights are published.
Questions
Frequently asked
Can you make your own trail camera mount?
Yes, and for post and board mounts it is genuinely worth doing. A trail camera attaches with a 1/4-20 bolt — the same thread as a camera tripod — so anything rigid with a hole in it will hold one. What a homemade mount does not give you is quick adjustment, which is what a commercial head is actually selling.
Is a homemade trail camera lock box worth building?
Usually not. Between 14 to 16 gauge steel, cutting apertures that line up with the lens, flash and sensor, welding corners that resist prying and finishing it so it does not rust or shine, a homemade box typically costs more than a purpose-cut one and fits worse. The exception is a camera model nobody makes a box for.
What size bolt does a trail camera use?
A 1/4-20 thread, the standard camera tripod thread. That is why a tripod, a T-post bracket and a scrap of drilled flat stock all work as mounts, and why 1/4-20 adapters for lag screws are sold everywhere.
Can I use a bike lock cable on a trail camera?
You can thread one, but it does not do the job. A bicycle cable cuts in about a second with hand bolt cutters, and the point of a camera cable is to turn an opportunistic grab into a noisy job with tools. Braided steel around 5/16 of an inch is what security boxes cut their slots for.
How do you mount a trail camera without a tree?
A T-post with a clamp or a hose-clamped bracket is the most reliable option, and fence line usually already exists on the property. A driven ground stake works in open ground but can heave with frost, and an old camera tripod will do for a short temporary set.
Does painting a trail camera help hide it?
Matte paint or bark-pattern tape on the case does help break up the outline, and it is harmless. Painting over the infrared array is not — it absorbs the IR the camera needs and produces black night images. Concealment technique is covered in how to hide a trail camera.
Keep reading
Related on Cam & Canopy
- Best trail camera security boxesThe boxes cut for named camera bodies, and the universal fallback.
- Best trail camera locks and cablesThe one component with no sensible homemade substitute.
- Best trail camera tree mountsWhat a shimmed board mount cannot do.
- Best stakes and T-post mountsThe commercial version of the fence-line build.
- How to keep your trail camera from being stolenWhat a box and cable actually prevent.
- Trail camera heightHow high to put the mount once you have built it.
Receipts
Sources
- HME Products — Trail Camera Holder Tree Mount product page (checked 2026-09-21)
- HME Products — T-Post Trail Camera Holder product page (checked 2026-09-21)
- Master Lock — 8419DPF Python adjustable locking cable product page (checked 2026-09-21)
- WILDARES — brand's own Amazon listing, published width, length, webbing rating and buckle material (checked 2026-10-16)
- CAMLOCKbox — Tactacam Reveal X 3.0 Security Box product page (checked 2026-09-21)
Every number above is traceable: specs come from the maker's own product pages (linked on every product), plan prices from the maker's plan page with an “as of” date, and independent measurements are attributed to whoever made them. Amazon prices change often, so every buy button takes you to Amazon's current price for that listing. Read the full method.